How To Lattice Pie Crust

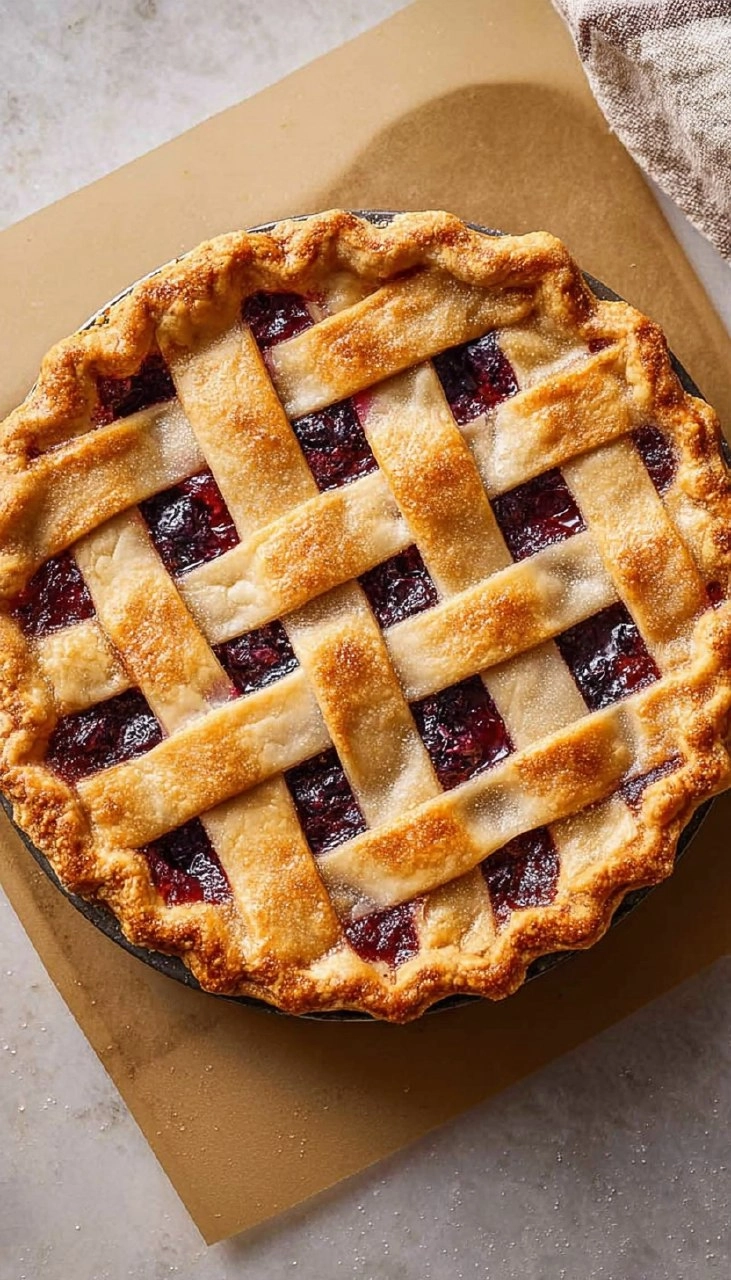
How To Lattice Pie Crust is a beautiful and impressive way to elevate your homemade pies. The intricate weave of the crust not only looks inviting but also adds a delightful texture to your favorite fillings. It combines the savory crispness of pie crust with the lusciousness of the filling, offering that perfect balance that makes every bite a celebration. Once you master this technique, you’ll find yourself wanting to adorn every pie with a lattice top.
Table of Contents
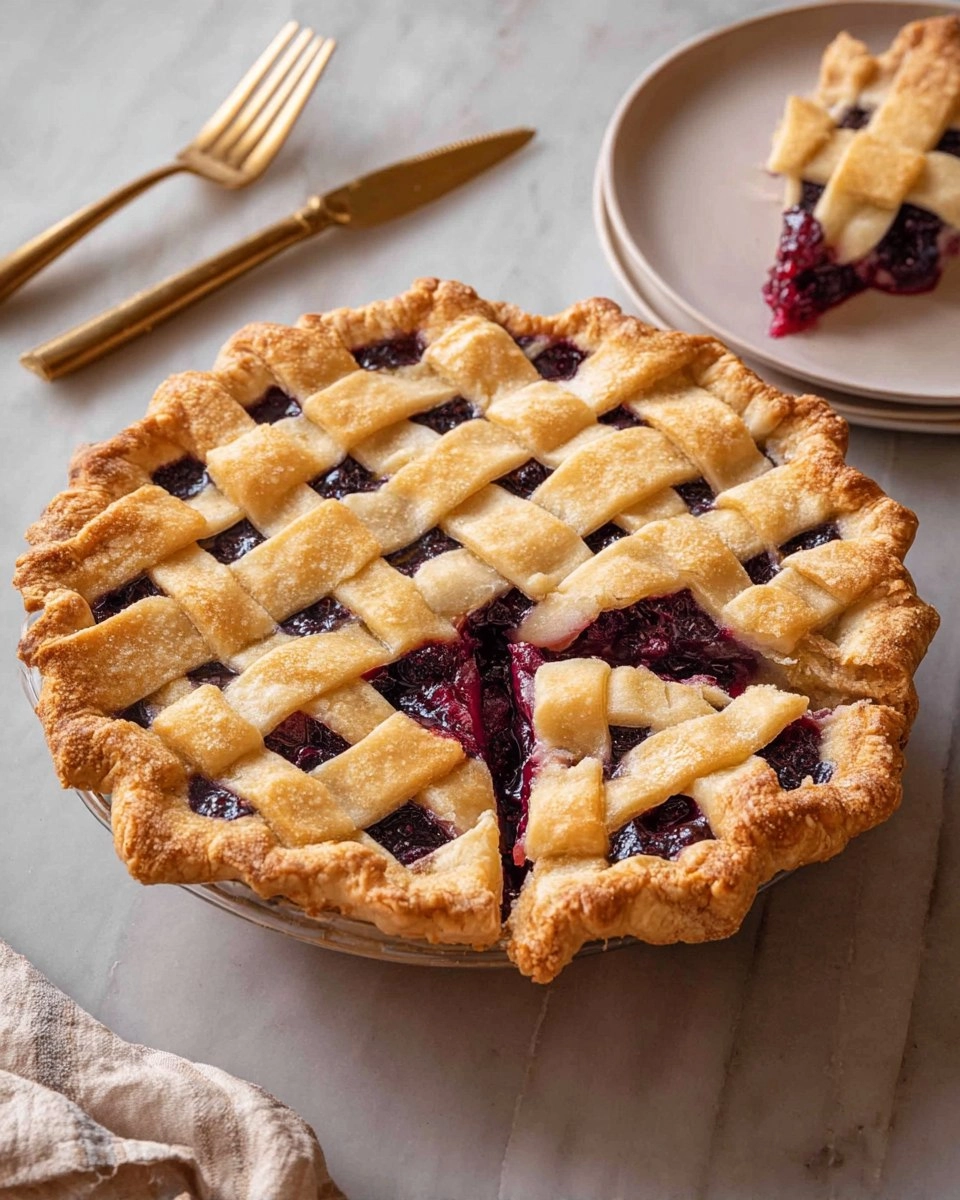
I remember the first time I tackled this technique; it felt like stepping into a new world of pie-making. The satisfaction of weaving the strips of dough together and the anticipation of unveiling a gorgeous pie straight from the oven is something you simply can’t replicate with a store-bought pie. Learning how to create a lattice pie crust might seem challenging, but with a bit of patience and practice, it can be a fun and rewarding kitchen project. Let’s get those rolling pins ready and dive into this gratifying adventure!
Why You’ll Love This Recipe
- Simple & Quick: This lattice pie crust is easier than it looks and can be made in about 40 minutes.
- Irresistible Flavor: You’ll enjoy the buttery, flaky crust that pairs perfectly with sweet or savory fillings.
- Eye-Catching Appeal: The crisscross pattern makes any pie look impressive enough for special occasions.
- Flexible Serving: Perfect for any fruit pie, quiche, or even savory pot pies, making it a versatile addition to your baking repertoire.
- Diet-Friendly Options: Easily adaptable to gluten-free or vegan dough for those with dietary restrictions.
Ingredients You’ll Need
- Pie dough: For this lattice crust, homemade or store-bought pie dough works; however, I recommend a buttery, flaky recipe that complements your filling beautifully.
- Pie filling: Use your favorite homemade or store-bought filling; think fruit combinations like apple, cherry, or even a creamy custard.
- Egg wash (optional): One egg whisked with one tablespoon of water or milk enhances the golden-brown color of your crust and gives it a lovely sheen.
How to Make How To Lattice Pie Crust
Roll Out the Dough: Start by rolling out one disc of pie dough into a circle or square, ensuring it’s larger than your pie pan—about ⅛-inch thick. Take your time with this step; an even dough ensures uniform baking.
Score the Strips: Use a ruler or tape measure to score lines across the dough, making them 1 inch apart from edge to edge. This will guide you in creating equal strips.
Cut the Strips: Slice along the scored lines with a bench scraper or knife to produce long parallel strips. Remember to save the longest strips for the middle of the lattice; they provide better structure.
Lay the First Layer: Arrange five to six strips horizontally over the pie filling, ensuring they are spaced evenly apart.
Fold the Strips: Taking the second strip from one edge, fold every other strip back toward the center of the pie, holding them folded in half. This technique allows the next strip to fit snugly.
Add a Perpendicular Strip: Place one of the remaining strips from your pile perpendicular to the horizontal strips, close to the base of the folds. Align it well for a beautiful finish.
Return the Folded Strips: Gently fold back the previously folded strips to lie on top of the perpendicular strip. You’re creating that lovely crisscross pattern now!
Continue Weaving: Alternate the folding of the strips: fold one set back, lay down another cross-strip about ¾ inch to 1 inch apart, and unfold the first set over it. Keep weaving until you reach both edges of the pie.
Trim Excess Dough: Use kitchen shears to trim the excess bottom crust and lattice strips to about 1 inch beyond the edge of the pie pan. This creates a nice edge for sealing.
Seal the Edges: Fold the excess dough up and over itself, pressing gently to adhere the lattice ends to the bottom crust. This step helps prevent spills during baking.
Decorate the Edge: Employ your favorite decorative pattern to the edge of the crust to seal it, giving the pie a finished look that’s just as lovely as the center.
Chill and Prepare for Baking: Freeze the assembled pie for 15 to 20 minutes. This helps the crust hold its shape during baking. If you like, brush the crust with egg wash for that beautiful golden color.
Bake to Perfection: Bake your pie according to your filling’s instructions until the crust is golden brown and the filling is bubbling around the edges—a fragrant reward for your hard work!
Storing & Reheating
Store your unbaked lattice pie crust in the refrigerator for up to 2 days, covering it with plastic wrap to prevent drying out. If you want to freeze it, wrap tightly in foil or a freezer-safe bag and store for up to 3 months. When you’re ready to bake, there’s no need to thaw, simply pop it into the oven. If you have leftovers, they can be refrigerated in an airtight container for 3-4 days. Reheat in the oven at 350°F for about 10-15 minutes to refresh the crust, although the texture may soften slightly.
Chef’s Helpful Tips
- Make sure your pie dough is chilled before rolling it out; this keeps the crust flaky.
- If your dough becomes too warm while working, refrigerate it briefly to firm it up again.
- Avoid overfilling your pie; this can cause overflowing and make the lattice difficult to manage.
- Use a sharp knife or bench scraper for clean edges when cutting the strips.
- Experiment with different patterns, like a diagonal lattice or an open weave for unique presentations.
- Remember, practice makes perfect—each pie will help you hone your technique!
When learning how to create a lattice pie crust, remember that practice is key. The more you do it, the more comfortable and confident you will feel. So don’t hesitate to experiment with different pie fillings and designs.
Recipe FAQs
Can I use store-bought pie dough for lattice crust?
Absolutely! Store-bought pie dough can be a great time-saver if you’re short on time. Just make sure to thaw it properly if it’s frozen and handle it gently while shaping and cutting.
How can I make a gluten-free lattice crust?
Using a gluten-free pie dough mix tailored for pie crusts can yield excellent results. Ensure it’s well chilled before rolling, and if you’re up for it, try your own homemade gluten-free version.
How do I prevent my lattice crust from getting soggy?
Pre-baking your pie crust briefly before adding the filling can help prevent sogginess. This technique allows the crust to firm up before it encounters moisture from the filling.
What can I substitute for the egg wash?
If you prefer not to use egg wash, you can brush the crust with milk or a dairy-free alternative like almond milk for a lovely finish. For a vegan option, simply leave the wash off; the crust will still bake beautifully!
PrintMore Desserts & Appetizers Recipes
- Strawberry Rhubarb Pie
- Homemade Blueberry Pie with Lattice Top
- The Best Apple Pie
- Apple Blueberry Pie with Flaky Lattice Crust
- Blueberry Peach Pie
Did You Enjoy Making This Recipe? Please rate this recipe with ⭐⭐⭐⭐⭐ or leave a comment.
📖 Recipe Card

How To Lattice Pie Crust
- Prep Time: 30 minutes
- Cook Time: 45 minutes
- Total Time: 1 hour 15 minutes
- Yield: 1 pie 1x
- Category: Desserts
- Method: Baking
- Cuisine: American
Description
This lattice pie crust adds an irresistibly charming touch to your pies. It’s made with simple ingredients and easy to follow steps, making it a delightful choice for homemade desserts.
Ingredients
- 2 discs pie dough
- 2 cups pie filling
- 1 egg whisked with 1 tablespoon water or milk for egg wash (optional)
Instructions
- Roll out one disc of pie dough into a circle larger than your pie pan, about ⅛-inch thick.
- Score lines 1 inch apart from edge-to-edge using a ruler and a knife.
- Cut along the scored lines to create long strips, saving the longest for the center.
- Lay 5-6 strips over the pie filling, parallel and spaced evenly.
- Fold back every other strip starting from the second strip.
- Place a strip from the remaining pile perpendicular to the first strips, near the folds.
- Return the folded strips to lay on top of the perpendicular strip.
- Fold back the other strips, lay another perpendicular strip, and unfold the strips again.
- Continue alternating until both edges are reached, laying strips spaced about ¾ to 1 inch apart.
- Trim the excess bottom crust and lattice strips to about 1 inch beyond the pie pan edge.
- Fold the edges up and over to seal the ends to the bottom crust.
- Press a decorative pattern into the edge of the crust to finish.
- Freeze for 15 to 20 minutes, brush with egg wash if desired, and bake.
Notes
Ensure the pie dough is cold for cleaner cuts.
Use a sharp knife or bench scraper for better precision.
Experiment with various fillings for different flavors.
Nutrition
- Serving Size: 1 slice
- Calories: 230
- Sugar: 5g
- Sodium: 150mg
- Fat: 12g
- Saturated Fat: 3g
- Unsaturated Fat: 7g
- Trans Fat: 0g
- Carbohydrates: 29g
- Fiber: 2g
- Protein: 3g
- Cholesterol: 50mg