
Oreo Icebox Cake

Oreo Icebox Cake has been a favorite dessert of mine for years. The combination of rich, creamy layers and the crunch of chocolate cookies creates a texture that simply melts in your mouth. It’s the perfect sweet treat for gatherings, celebrations, or even just an indulgent afternoon snack. Who wouldn’t love diving into a chocolatey dessert that feels both nostalgic and incredibly satisfying?
Table of Contents
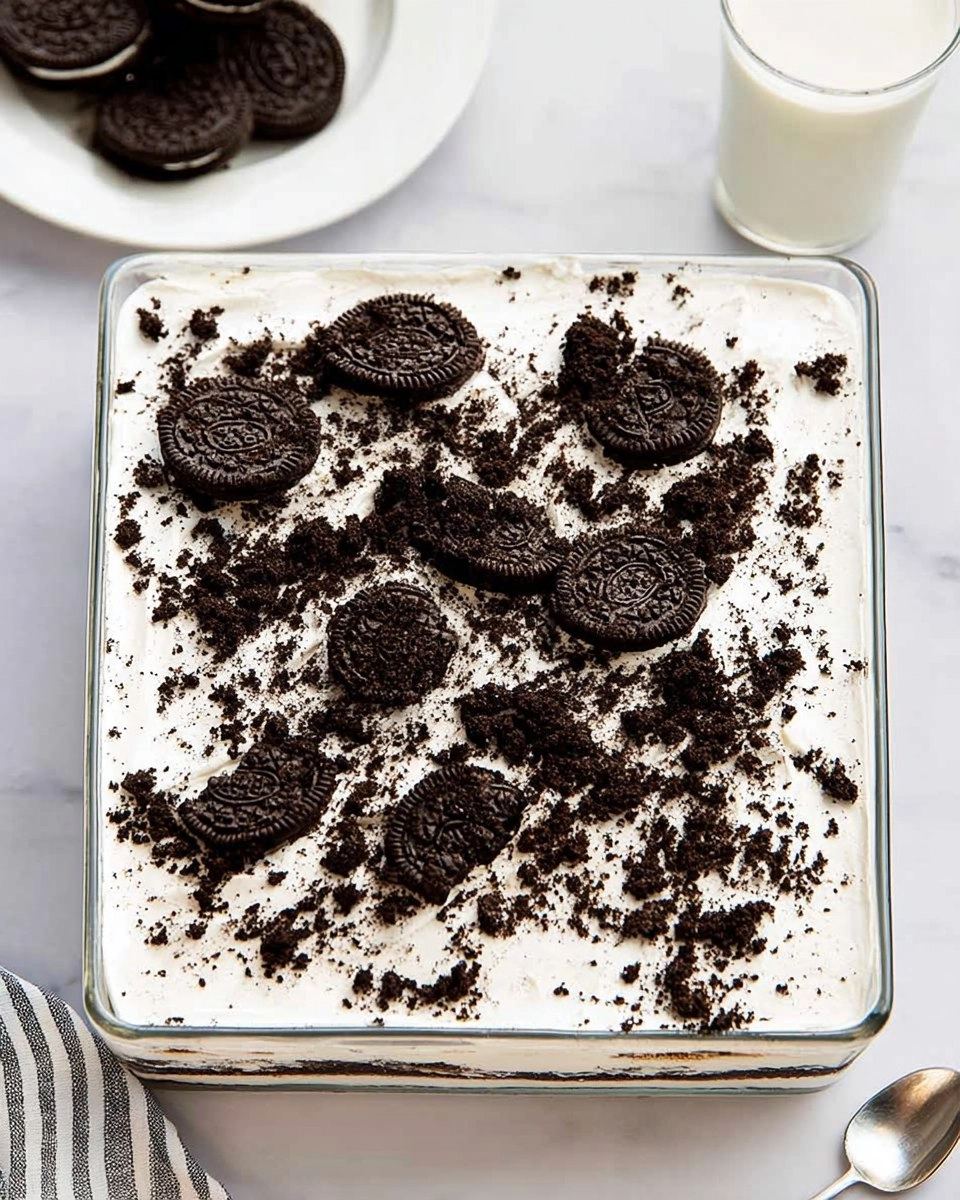
The best part about this dessert? It requires no baking and comes together in a breeze. Just layer, chill, and enjoy! Whether you’re bringing a dish to a potluck or treating yourself to something special, Oreo Icebox Cake will surely impress. And honestly, I can’t wait for you to experience it!
Why You’ll Love This Recipe
- Simple & Quick: This cake comes together in about 30 minutes, with minimal effort involved.
- Irresistible Flavor: Creamy whipped topping combined with crunchy Oreo cookies creates an explosion of flavor.
- Eye-Catching Appeal: Layers of cookies and cream look stunning in any dish.
- Flexible Serving: Perfect for any occasion, from casual family dinners to festive parties.
- Diet-Friendly Options: Easily adaptable for gluten-free diets by using gluten-free cookies!
Ingredients You’ll Need
- 48 Oreo cookies: The star of this dessert! Use classic Oreos for that familiar taste, or try other flavors for a twist.
- 4 ounces cream cheese, softened: Adds richness and a slight tang; you can substitute with mascarpone for a different flavor.
- 2 ½ cups (595 g) heavy whipping cream, cold: Essential for that fluffy whipped texture. If you need a lower-fat option, try using a whipped topping.
- ½ cup (62.5 g) confectioners’ sugar: This sweetens the cream without making it gritty. Granulated sugar is too coarse for this cake.
- 1 teaspoon vanilla extract: Brings depth to the flavor; always choose pure vanilla for the best results.
- Crushed Oreo cookies: For topping. This adds a delightful crunch to each slice.
How to Make Oreo Icebox Cake
- Chill Your Tools: Begin by placing the bowl of your stand mixer and whisk attachment in the freezer for about 15 to 20 minutes. Chilling these helps to whip the cream more effectively.
- Beat the Cream Cheese: In the chilled bowl, beat 4 ounces of softened cream cheese until it’s smooth. This step is crucial for avoiding lumps.
- Add Whipped Cream and Sugar: Pour in 2 ½ cups of cold heavy whipping cream, along with ½ cup of confectioners’ sugar and 1 teaspoon of vanilla extract. Beat on medium-high speed until stiff peaks form, being careful not to overbeat as it could become grainy.
- First Layer of Cream: Spread a thin layer of the whipped cream mixture into the bottom of an 8×8-inch baking dish. This acts as the base for your cookie layers.
- Layer the Cookies: Arrange a single layer of Oreo cookies over the whipped cream, breaking a few cookies if necessary to fit the size of the dish.
- Add More Cream: Spread about one-third of the remaining whipped cream mixture evenly over the cookie layer, ensuring every corner is covered.
- Repeat Layers: Continue the layering process twice more, finishing with the final layer of whipped cream on top. This results in a beautiful, tall cake.
- Sprinkle with Crushed Oreos: Top your cake with crushed Oreo cookies for that extra crunch and visual appeal.
- Chill in the Fridge: Cover the dish tightly and refrigerate for at least 6 to 8 hours, ideally overnight. The longer it chills, the softer the cookies will get, resembling cake.
- Serve Cold: When ready to serve, cut into squares. For the cleanest slices, freeze the cake for 20 to 30 minutes before cutting, making it easier to slice through the softened cookies.
Storing & Reheating
To keep your Oreo Icebox Cake fresh, store it tightly covered in the refrigerator for up to 4 days. It’s best enjoyed cold, straight from the fridge, and doesn’t require reheating. If you want to save some for later, feel free to freeze individual slices in an airtight container for up to 3 months. Just remember that the texture may change slightly upon thawing.
Chef’s Helpful Tips
- Avoid Overbeating: When whipping the cream mixture, stop right when stiff peaks form to prevent a grainy texture.
- Perfect Layers: To ensure even layers, spread the whipped cream gently but thoroughly over the cookies.
- Cool Down for Mess-Free Slicing: If you’re looking for a clean slice, try placing the cake in the freezer prior to cutting, as it helps to firm up the layers.
- Experiment with Flavors: Don’t hesitate to try other cookie flavors or add crushed candy bars for a fun twist!
One of the most delightful things about Oreo Icebox Cake is how it invites creativity. You can easily infuse different flavors throughout the layers or switch things up with various types of cookies. This dessert adapts beautifully to your preferences, making it a fun one to prepare.
Recipe FAQs
Can I make this cake ahead of time?
Absolutely! Oreo Icebox Cake is perfect for making ahead. In fact, it tastes even better after a day in the fridge, allowing the flavors to meld beautifully.
How long does this cake last in the refrigerator?
Stored properly in an airtight container or tightly covered, your Oreo Icebox Cake will last for about 4 days in the refrigerator. Enjoy it while it’s fresh for the best taste.
Can I use light cream cheese or whipped topping?
Yes, you can substitute light cream cheese for a lower-fat option. While the flavor might be slightly different, it will still work well in this recipe.
Is there a gluten-free option for this recipe?
Definitely! Many brands offer gluten-free Oreo cookies, which you can use to make this cake gluten-free. Just be sure to check the label to ensure it’s certified gluten-free.
This Oreo Icebox Cake is not just a dessert; it’s a tradition, a crowd-pleaser, and a sweet treat worth sharing. I hope you try making this delightful dessert at home. Its creamy layers, cookie crunch, and ease of preparation will soon make it a favorite in your household as well. Enjoy every decadent bite!
PrintMore Desserts & Appetizers Recipes
- Air Fryer Zucchini Tots
- Strawberry Cake
- Guinness Chocolate Cake | Rich Moist Chocolate Cake
- Peach Upside Down Cake
- Funfetti Cake Cheesecake
Did You Enjoy Making This Recipe? Please rate this recipe with ⭐⭐⭐⭐⭐ or leave a comment.
📖 Recipe Card

Oreo Icebox Cake
- Prep Time: 15 minutes
- Cook Time: 0 minutes
- Total Time: 15 minutes
- Yield: 9 servings 1x
- Category: Desserts
- Method: No-bake
- Cuisine: American
Description
This Oreo Icebox Cake is a no-bake dessert that combines rich cream cheese, cold whipping cream, and crunchy Oreo cookies. Perfect for gatherings, it’s easy to prepare and chilled to perfection, making it an irresistible treat for dessert lovers.
Ingredients
- 48 oreo cookies
- 4 ounces cream cheese, softened
- 2 ½ cups heavy whipping cream, cold
- ½ cup confectioners' sugar
- 1 teaspoon vanilla extract
- Crushed Oreo cookies
Instructions
- Chill the bowl of the stand mixer and whisk attachment in the freezer for 15 to 20 minutes.
- In the chilled bowl, beat the cream cheese until smooth. Add the heavy whipping cream, confectioners’ sugar, and vanilla extract. Beat on medium-high speed until stiff peaks form, being careful not to overbeat.
- Spread a thin layer of whipped cream mixture into the bottom of an 8×8-inch baking dish.
- Arrange a single layer of Oreo cookies over the whipped cream, breaking some cookies as needed to fit.
- Spread about one-third of the remaining whipped cream mixture evenly over the cookies.
- Repeat the layers two more times, finishing with a final layer of whipped cream on top.
- Sprinkle the top with crushed Oreo cookies.
- Cover tightly and refrigerate for at least 6 to 8 hours or overnight, allowing the cookies to soften and create a cake-like texture.
- Serve cold. For clean slices, place the cake in the freezer for 20 to 30 minutes before cutting.
Notes
Chilling the bowl and whisk attachment is essential for achieving stiff peaks in the whipped cream.
Allow the cake to sit overnight in the fridge for the best flavor and texture.
Feel free to top with additional crushed Oreos or chocolate shavings before serving.
Nutrition
- Serving Size: 1 slice
- Calories: 300
- Sugar: 22 g
- Sodium: 150 mg
- Fat: 25 g
- Saturated Fat: 15 g
- Unsaturated Fat: 7 g
- Trans Fat: 0 g
- Carbohydrates: 32 g
- Fiber: 2 g
- Protein: 3 g
- Cholesterol: 55 mg


