
Plum Bars

There’s something utterly enchanting about the combination of fruity sweetness and buttery crust that makes plum bars irresistible. These delightful treats are soft and chewy, punctuated with perfectly tart plums that create a burst of flavor with every bite. It’s hard to resist the warm aromas wafting through the kitchen, inviting family and friends to gather and share in the joy. Plum bars are not only delicious but also incredibly easy to whip up, making them a go-to recipe for any occasion, whether it’s a casual snack or a sweet dessert to impress at a gathering.
Table of Contents
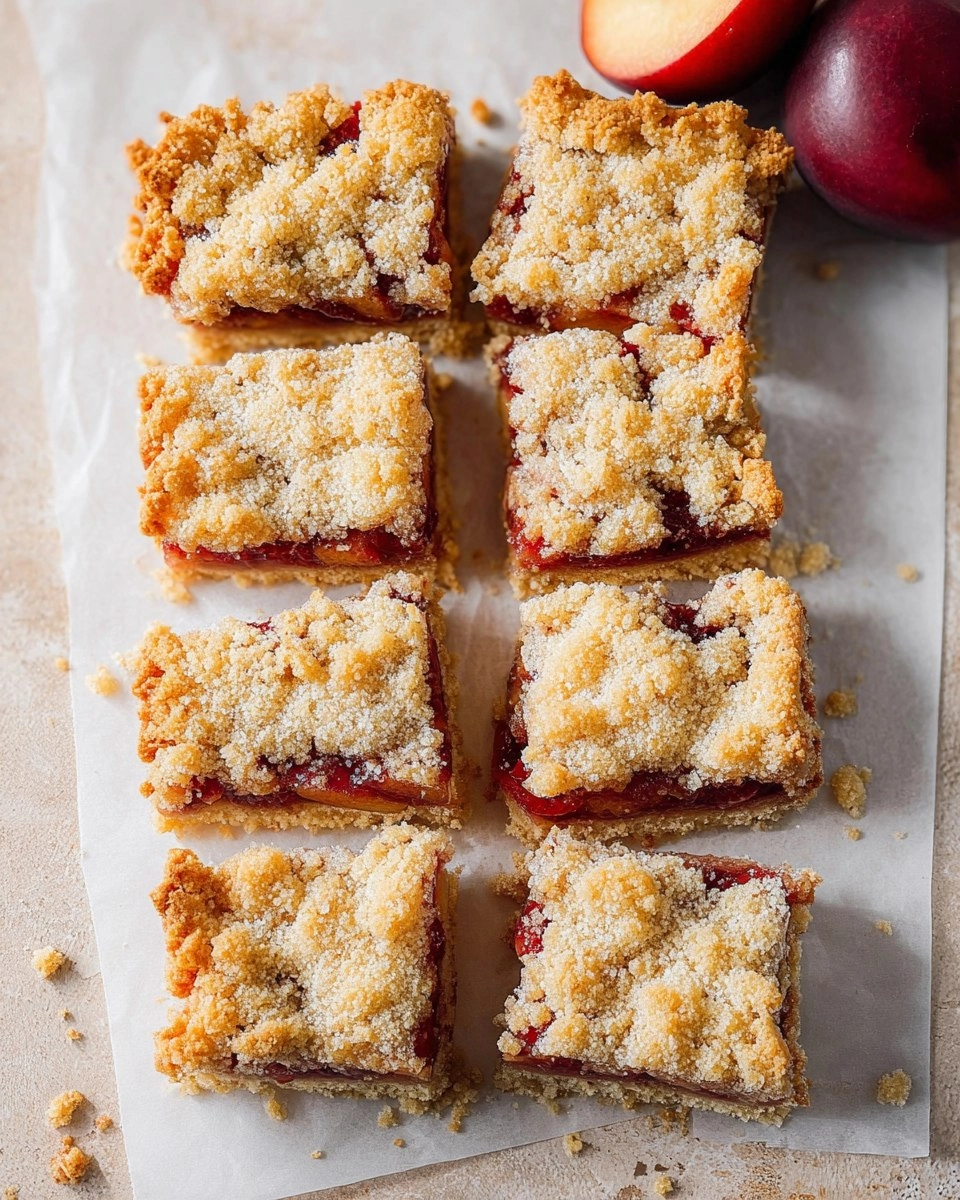
I first stumbled upon this recipe a few summers ago when my local market overflowed with fresh plums. The vibrant colors and the promise of juicy, sweet fruit caught my eye, and I couldn’t help but grab a basketful. Little did I know, I was about to fall in love with making plum bars! My first attempt filled the house with an inviting scent, sparking nostalgia for childhood snacks. Now, every time I recreate this dish, it feels like a warm hug from the past. You’ll certainly want to bring a batch of these cozy plum bars into your home—trust me; they’ll become a cherished favorite in no time.
Why You’ll Love This Recipe
- Simple & Quick: With just a few straightforward steps, you can have fresh plum bars ready in about an hour.
- Irresistible Flavor: Each bite features a delightful blend of buttery crust and sweet, tart plums that dance on your palate.
- Eye-Catching Appeal: The vibrant purple-hued plums make these bars not only delicious but visually stunning, perfect for parties or picnics.
- Flexible Serving: Enjoy them as a midday snack, a delightful dessert after dinner, or even as a breakfast treat with your morning coffee.
- Diet-Friendly Options: Easily customize for dietary needs; consider gluten-free flour for a gluten-free version.
Ingredients You’ll Need
- 1 ¾ cups all-purpose flour: This is the base for your crust and filling, providing structure. For a gluten-free option, use a 1:1 baking blend.
- ⅔ cup sugar: Adds sweetness to the crust and helps balance the tartness of the plums. Substitute with coconut sugar for a lower glycemic option.
- ½ tsp baking powder: This leavening agent creates a light texture. Be sure it’s fresh for the best results.
- ¼ tsp salt: Enhances flavor and balances sweetness.
- ½ cup cold butter: Butter gives richness and flakiness to the crust. Use unsalted butter for better control over flavor.
- 1 egg, whisked: Helps bind the crust together. If vegan, substitute with a flax egg (1 tablespoon ground flaxseed mixed with 2.5 tablespoons water).
- 2 tbsp milk: Brings moisture to the dough; can substitute with almond milk or any dairy-free variety.
- 4 plums, diced small: Fresh, ripe plums are key for this recipe; they provide juicy sweetness. If plums aren’t in season, try using peaches or nectarines.
- ¼ cup sugar (for the filling): Sweetens the plum mixture, balancing out tartness.
- 2 tbsp all-purpose flour: Helps thicken the filling and keeps it from being too watery.
- ½ tsp vanilla extract: Adds depth and warmth to the overall flavor profile.
How to Make Plum Bars
- Preheat the Oven: Start by preheating your oven to 400°F (200°C) and line an 8×8 baking dish with parchment paper for easy removal and cleanup.
- Make the Crust: In a large bowl, stir together 1 ¾ cups all-purpose flour, ⅔ cup sugar, ½ tsp baking powder, and ¼ tsp salt. Using a cheese grater, grate the cold ½ cup butter directly into the mixture for a perfect, flaky texture. Use your hands to mix until the butter looks like small pebbles.
- Combine Wet Ingredients: Add in the whisked egg and 2 tbsp milk, stirring until you have a messy dough texture. Don’t worry about it being perfectly smooth—the rustic look is part of the charm!
- Prep the Plums: In a separate medium bowl, add your diced 4 plums, ¼ cup sugar, 2 tbsp flour, and ½ tsp vanilla extract. Stir gently to ensure all the plum pieces are coated and set aside.
- Layer the Mixture: Next, press ⅔ of the crust mixture into the bottom of the prepared pan, creating an even base. Top it with your plum filling, spreading it into an even layer.
- Crust Topping: Crumble the remaining crust mixture over the plum filling, covering it as evenly as possible.
- Bake to Perfection: Place your pan in the preheated oven and bake for 30-32 minutes, or until the edges turn a lovely golden brown and the filling is bubbling at the edges.
- Cool and Enjoy: Once out of the oven, let the bars cool to room temperature before slicing. They’ll taste even better once they have set!
Storing & Reheating
For storing, keep your plum bars at room temperature in an airtight container for up to 3 days. If you want to extend their life, refrigerate them for up to a week in a sealed container. You can also freeze the bars for up to three months; simply wrap them tightly in plastic wrap and place them in a freezer-safe bag. When you’re ready to enjoy them, thaw in the fridge overnight or at room temperature for a few hours. Note that the texture may change slightly after freezing, but a quick reheat in the oven or microwave will restore some freshness.
Chef’s Helpful Tips
- The key to a flaky crust is keeping your butter cold. If it starts to soften while mixing, pop it back in the fridge for a few minutes!
- Ensure your plums are ripe for the best flavor; they should yield slightly when squeezed.
- If you find the filling too runny, consider adding an extra tablespoon of flour to help absorption.
- Make these bars ahead of time for a party; just be sure to let them cool completely before slicing and serving.
- Experiment with different fruits like cherries or apricots if you want a delicious twist on the classic.
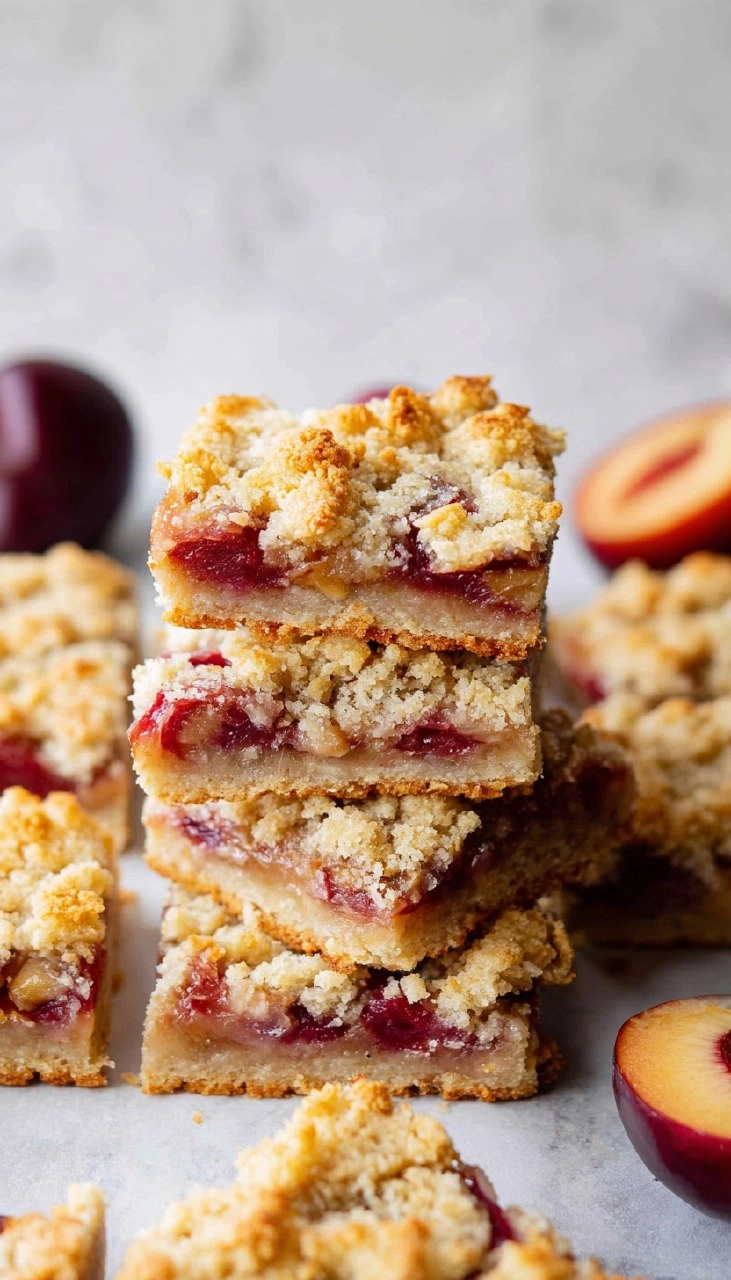
There’s truly nothing like the joy of baking at home, especially when it comes to creating something as cozy and flavorful as plum bars. This recipe is not only budget-friendly but also allows room for creativity; you can adjust it to suit your tastes and available ingredients. The delightful combination of buttery crust and tart plums is bound to bring a smile to your face, making each bite a little piece of happiness. So gather your ingredients, turn on the oven, and embrace the soothing joy of making these plum bars. Remember, the kitchen is where memories are made, and each batch is an opportunity to create something special.
Recipe FAQs
Can I use frozen plums for this recipe?
Absolutely! If using frozen plums, make sure to thaw and drain excess liquid before mixing them with sugar and flour. This helps prevent your filling from becoming too watery.
How can I make these plum bars gluten-free?
To make these plum bars gluten-free, substitute the all-purpose flour with a 1:1 gluten-free baking blend. Just ensure your baking powder is also gluten-free.
Can I make these plum bars vegan?
Yes! You can replace the egg with a flax egg (1 tablespoon ground flaxseed mixed with 2.5 tablespoons water) and use almond milk instead of regular milk for a delicious vegan option.
How do I know when the plum bars are done baking?
Look for golden brown edges and a filling that is bubbly around the edges. If you insert a toothpick into the center, it should come out clean or with a few moist crumbs attached.
PrintMore Desserts & Appetizers Recipes
- Brown Butter Brownies
- Carrot Cake Bars with Cream Cheese Frosting
- Mexican Street Corn Dip (Elote Dip)
- (Better Than) Grandma’s Zucchini Bread
- Caramel Dip For Apples
Did You Enjoy Making This Recipe? Please rate this recipe with ⭐⭐⭐⭐⭐ or leave a comment.
📖 Recipe Card
Plum Bars
- Prep Time: 15 minutes
- Cook Time: 32 minutes
- Total Time: 47 minutes
- Yield: 9 servings 1x
- Category: Desserts & Appetizers
- Method: Baking
- Cuisine: American
Description
These Plum Bars offer a delightful combination of fresh plums and a buttery crust. Perfectly easy to make and ideal for any occasion, this recipe brings a mouthwatering flavor that everyone will love. Enjoy them as a special dessert or a sweet snack!
Ingredients
- 1 ¾ cup all purpose flour
- ⅔ cup sugar
- ½ tsp baking powder
- ¼ tsp salt
- ½ cup butter, cold
- 1 egg, whisked
- 2 tbsp milk
- 4 plums, diced small
- ¼ cup sugar
- 2 tbsp all purpose flour
- ½ tsp vanilla extract
Instructions
- Preheat your oven to 400° F and line an 8×8 baking dish with parchment paper.
- In a large bowl, combine the flour, sugar, baking powder, and salt.
- Grate the cold butter into the flour mixture using a cheese grater.
- Mix with your hands until the mixture resembles small pebbles, then add the egg and milk, stirring to combine.
- In another bowl, mix the diced plums with sugar, flour, and vanilla until combined.
- Press ⅔ of the crust mixture into the prepared baking pan.
- Spread the plum mixture evenly over the crust in the pan and sprinkle the remaining crust mixture on top.
- Bake in the preheated oven for 30-32 minutes, or until the edges are golden brown. Let cool before slicing.
Notes
For extra flavor, try adding a pinch of cinnamon to the plum mixture.
Ensure the butter is cold for a flaky crust texture.
These bars can be served warm or at room temperature.
Nutrition
- Serving Size: 1 bar
- Calories: 250
- Sugar: 12g
- Sodium: 150mg
- Fat: 12g
- Saturated Fat: 7g
- Unsaturated Fat: 3g
- Trans Fat: 0g
- Carbohydrates: 33g
- Fiber: 2g
- Protein: 3g
- Cholesterol: 30mg


